

We did it!

Ceramic Tile Murals Tell the History of a Tampa Neighborhood
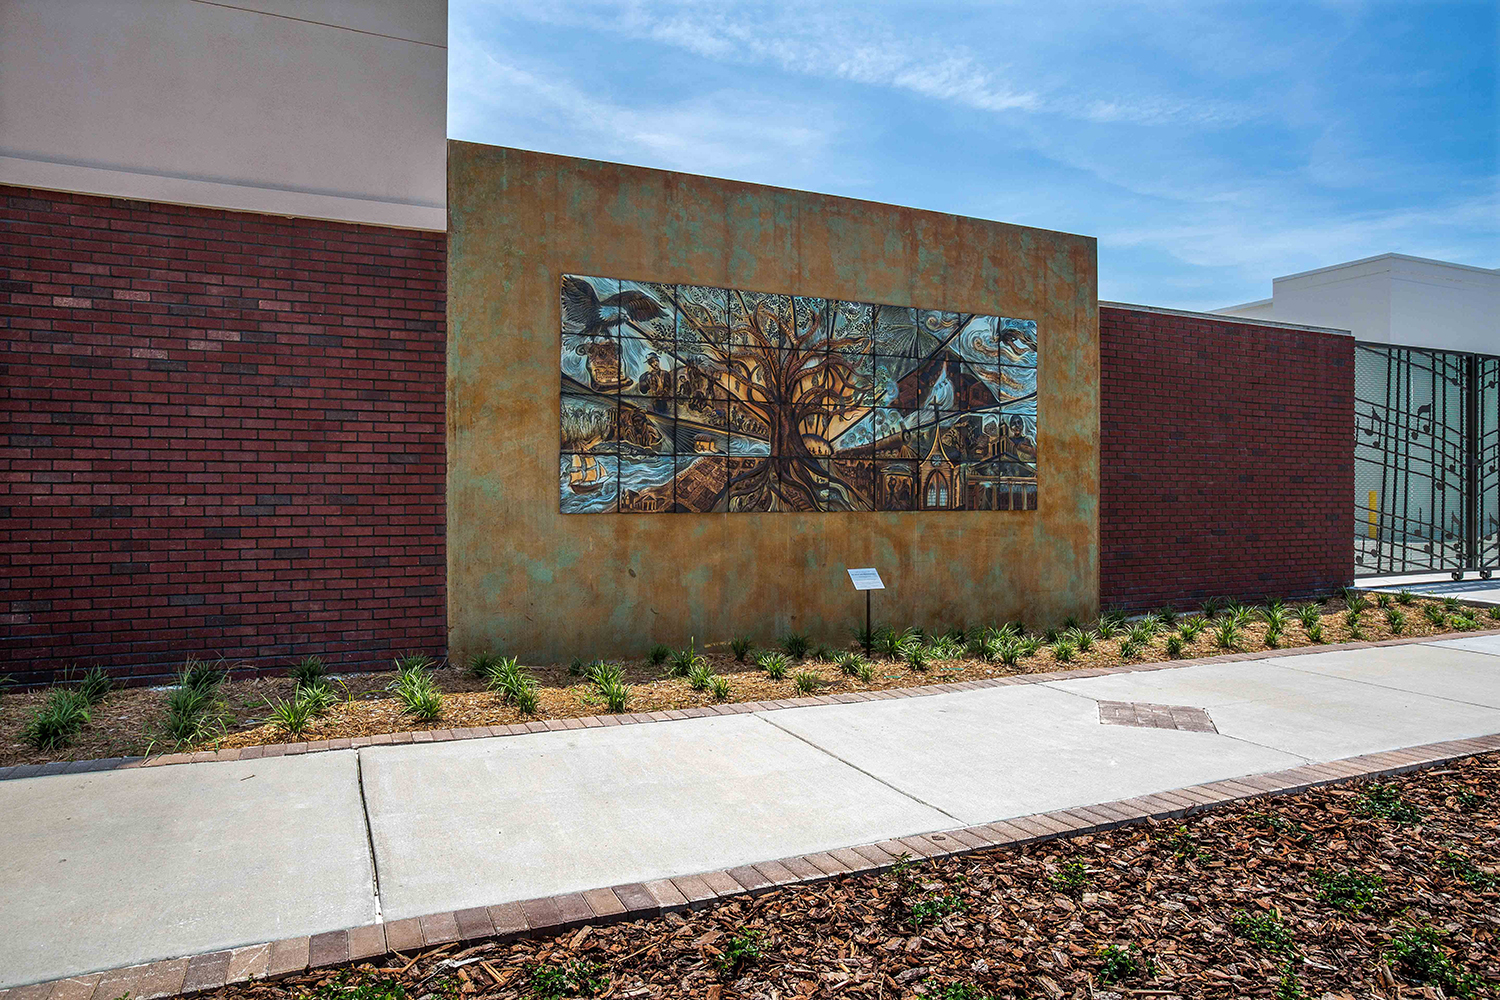
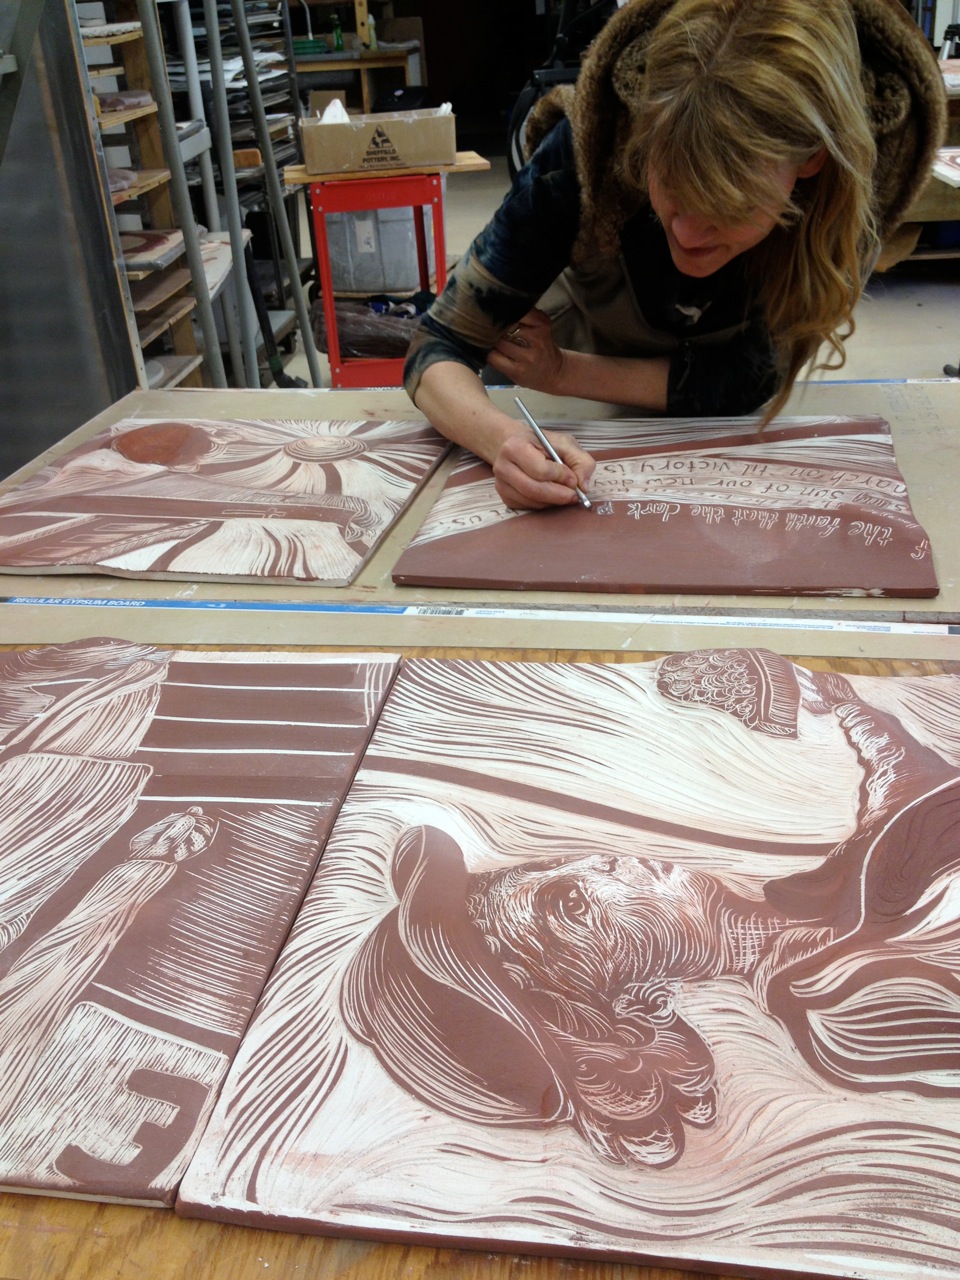
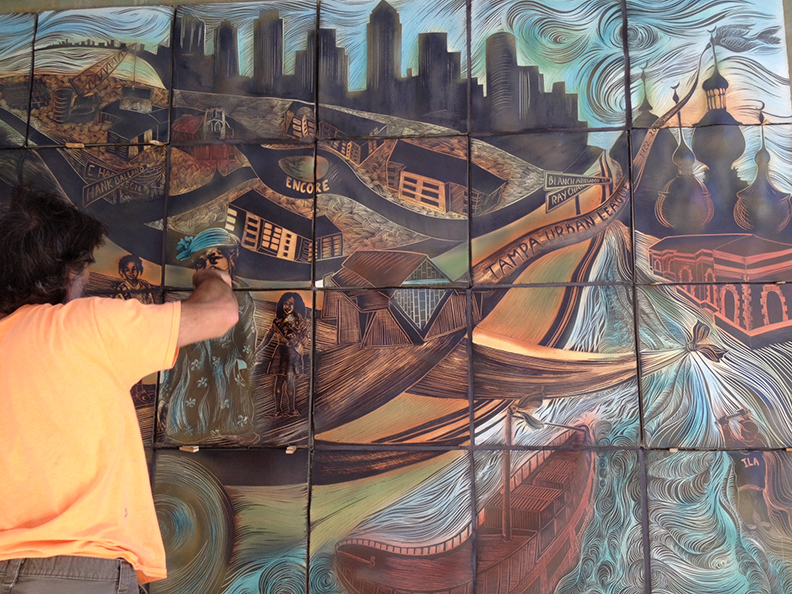
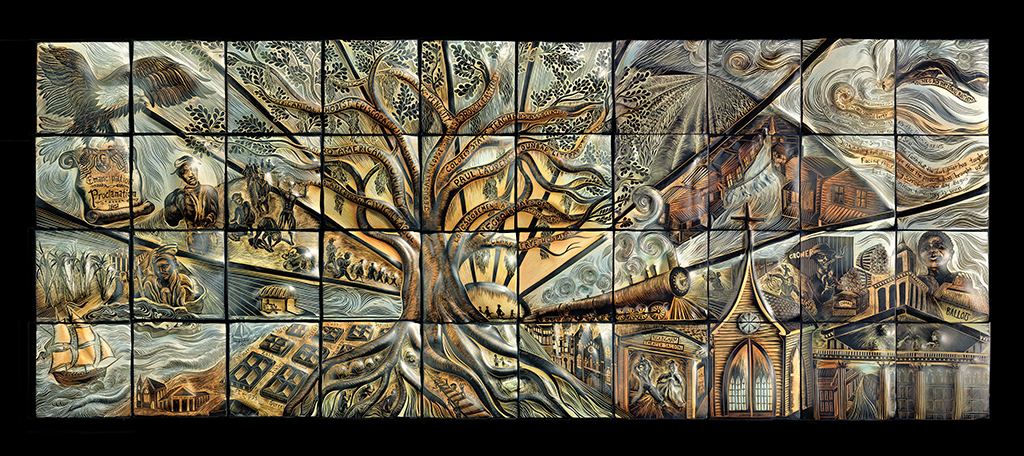
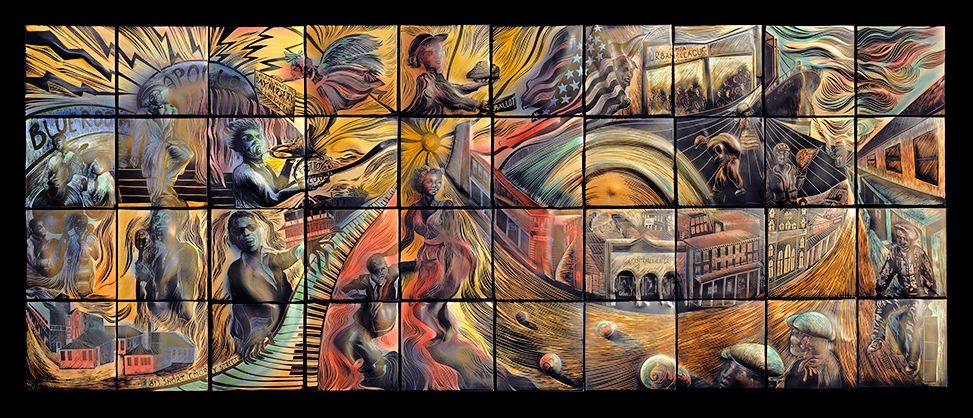
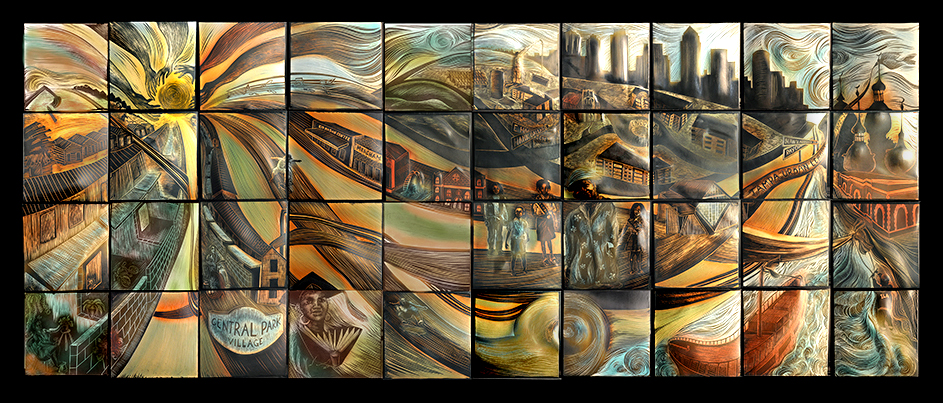
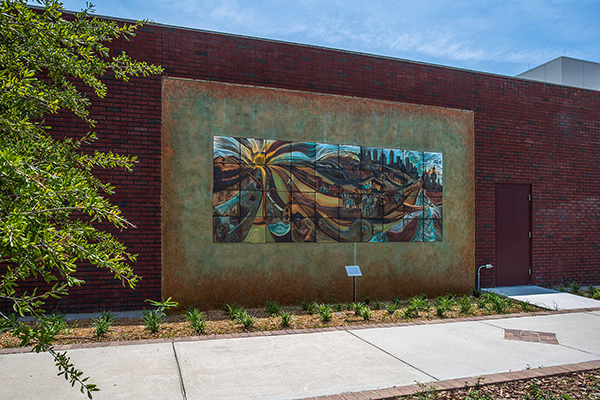 Natalie's public art grant installation in Tampa, Florida is complete! Natalie and Nick rolled back into the studio last Thursday after spending 18 days on site mortaring and grouting 3, 6' x 15' ceramic tile murals onto concrete walls that run the perimeter of a new mixed-use development in Tampa. This installation was made possible through a generous public art grant awarded to the studio in 2013 by the City of Tampa, and Trio at Encore LP. Through this grant, Natalie researched the history of this largely African-American neighborhood and then traced its 200-year history in a series of three large murals. Through interviews and consultations with several historians and community members, Natalie compiled a rich history of this incredible community. She then translated these collected stories, using a blend of abstraction and realism onto three, 6’ x15’ murals comprised of 18” square ceramic tiles. The title of the piece, "The Gift of Gathered Remembrances," is inspired by Secrets of the Talking Jaguar by Martin Prechtel. In this book Prechtel recounts the story of a people who are deeply secure in their cultural identity because of their daily remembrance and reverence towards their ancestors. As Natalie says, "It is so awesome to make clay tiles. As I move into making public art, I appreciate more and more that my ceramic tile murals can be part of the story-telling. The tactile quality of my carved tiles means that the viewer can appreciate the work through several senses. I love the permanence of tile too. The mural not only relays the history, but becomes part of the history as well. It's an art form that we shouldn't lose." In a playful moment, Natalie carved a replica of the Encore development into the third mural. Then, on the wall that lines the development she carved a little sun, the recurring element in each mural. You'll find her signature in the lefthand corner of the second (middle) mural.
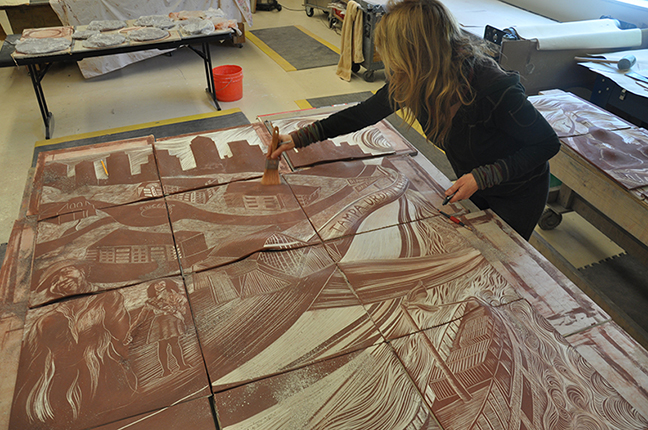
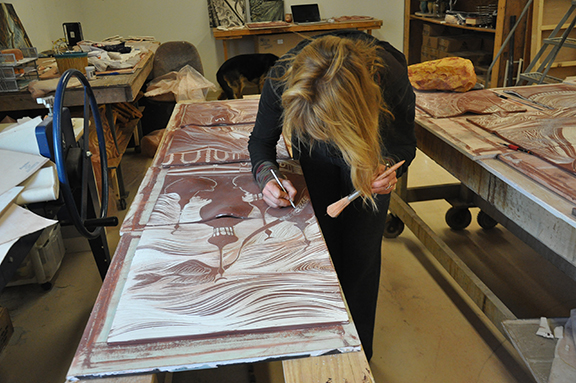
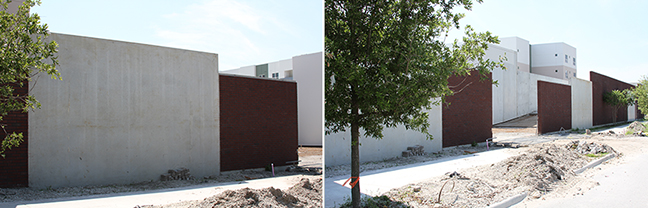
 After months of carving, glazing and firing 120, 18" x 18" tiles, we were ready to begin the installation. Nick Marchese, Natalie Blake Studios' installer, and Alan, his assistant, drove the tiles to Tampa to begin the job. The installation got off to a rocky start as Nick and Alan were delayed by rain and thunderstorms for the first two days. But after a few fitful starts the project got rolling. They prepped the concrete walls by scoring them (slightly scraping the concrete surface so that the tiles would adhere better).
After a week Natalie flew down to relieve Alan. By that time many tiles had been mortared to the concrete walls and the mood on the site was much better! Nick used the ultimate thin set for porcelain and glass tiles. The mortar is so strong that it is used for tiling swimming pools. In fact, a crew of workmen who were installing a swimming pool on site, came by to watch Nick work and were impressed with his choice of mortar. After admiring the mortar (as tilers will!) they hung around to admire the murals too.
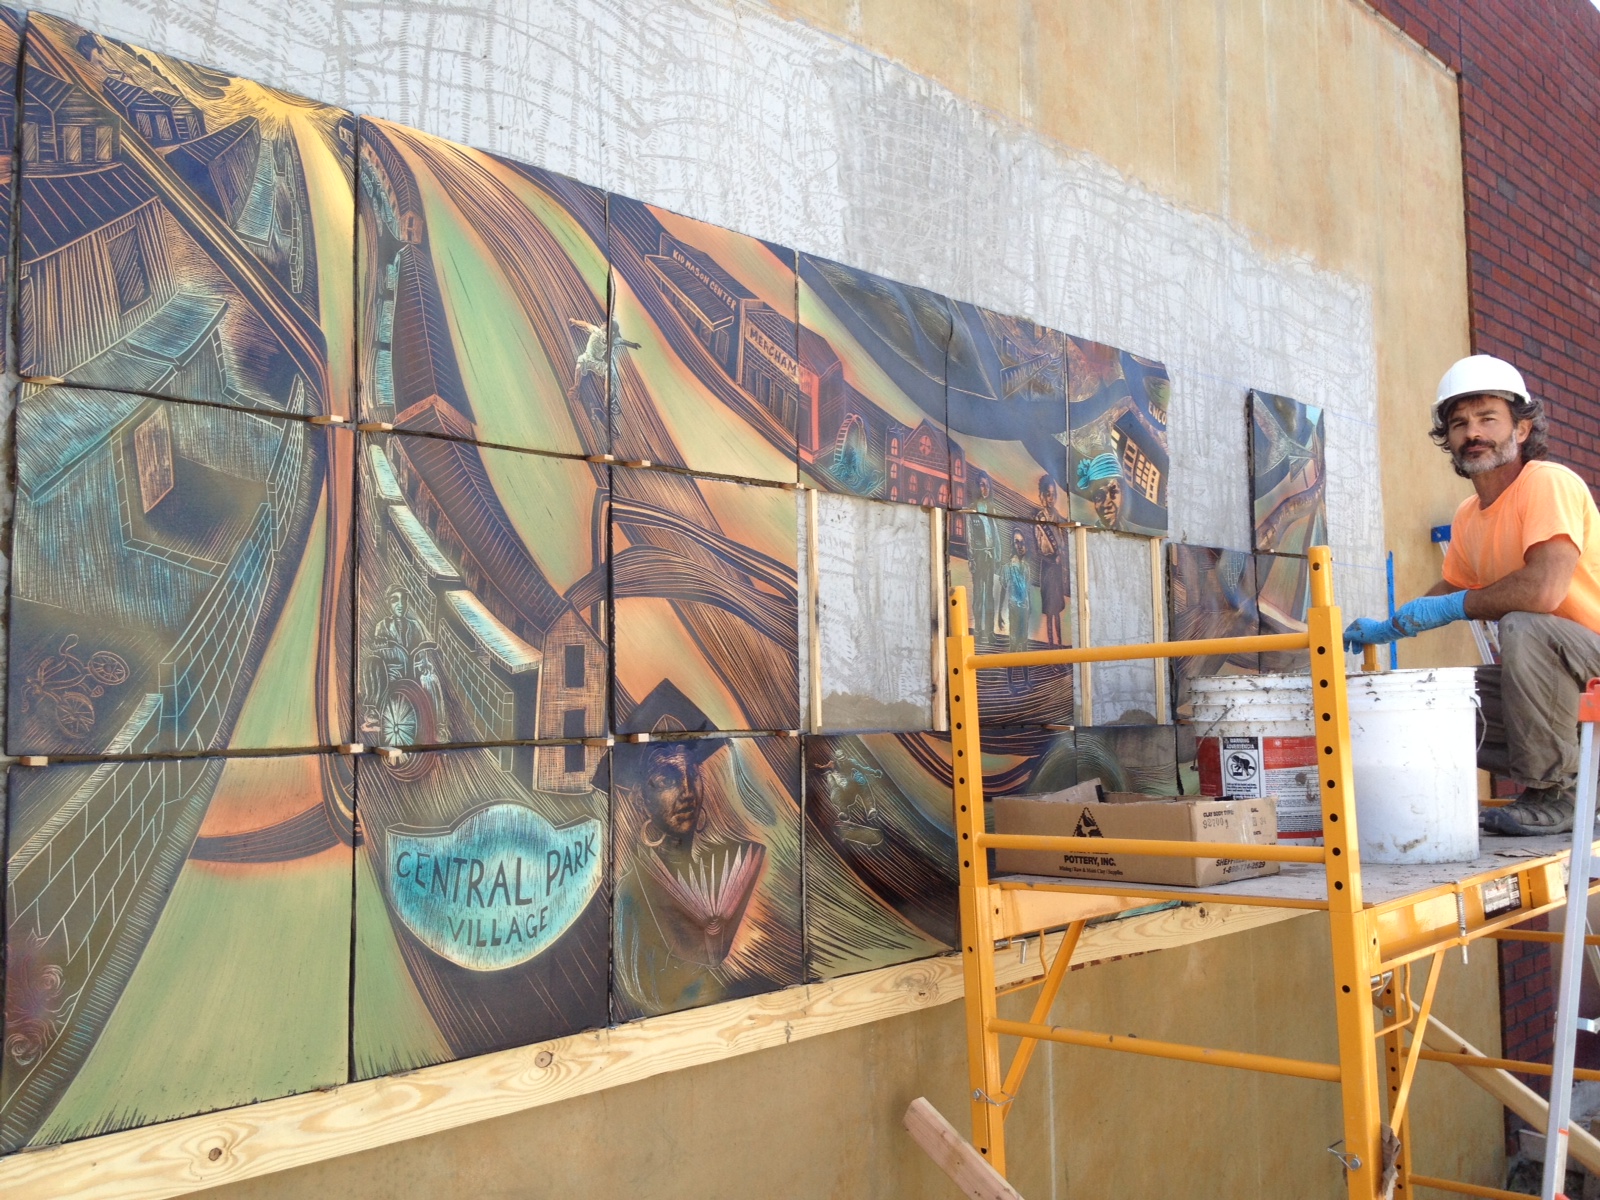
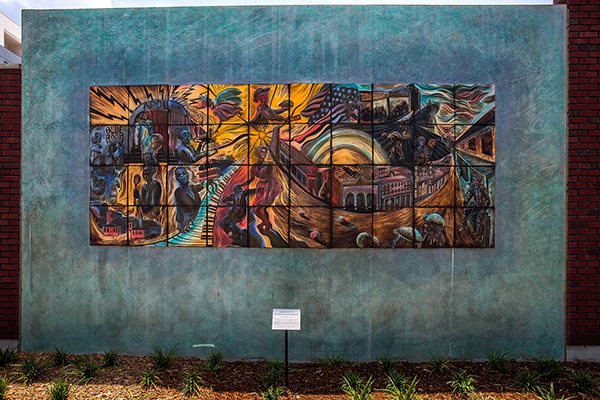
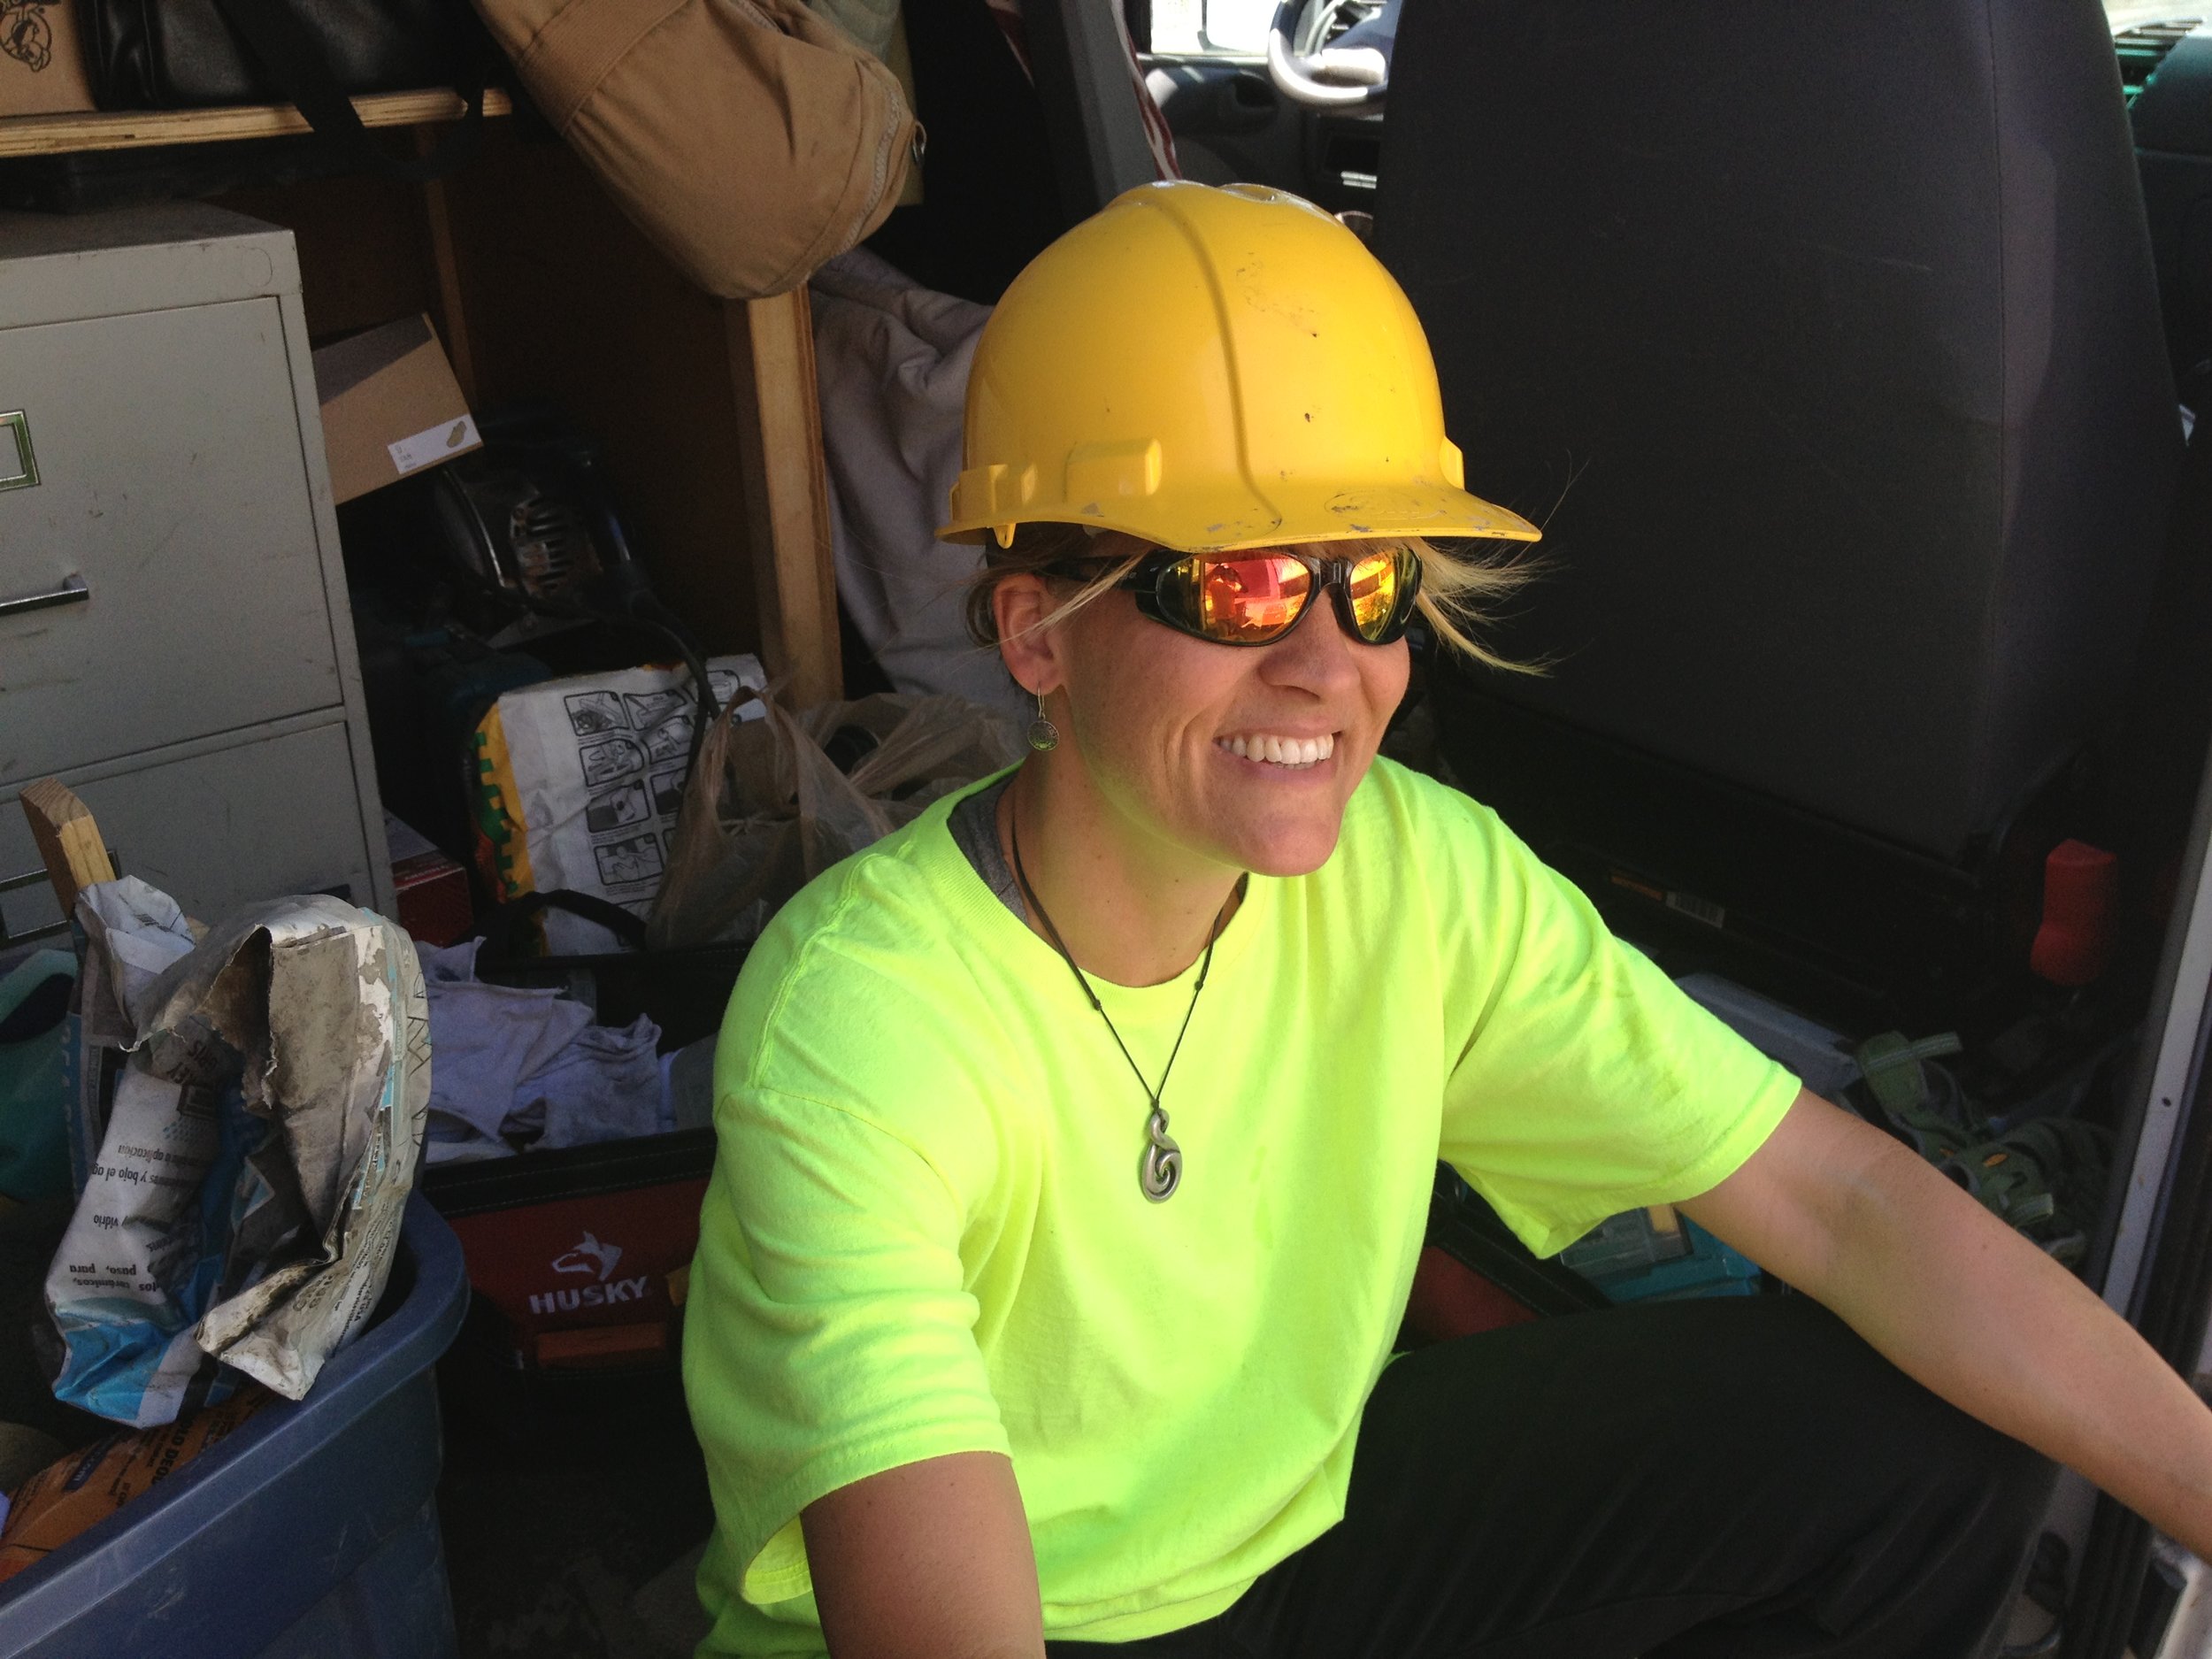
 The work site quickly became a hub of colorful activity. Natalie and Nick (and all other workers on the development site) had to wear bright, fluorescent shirts and hardhats for safety. The murals themselves were glazed in rich colors and the concrete walls around the murals were stained in lush orange, blue and purple.
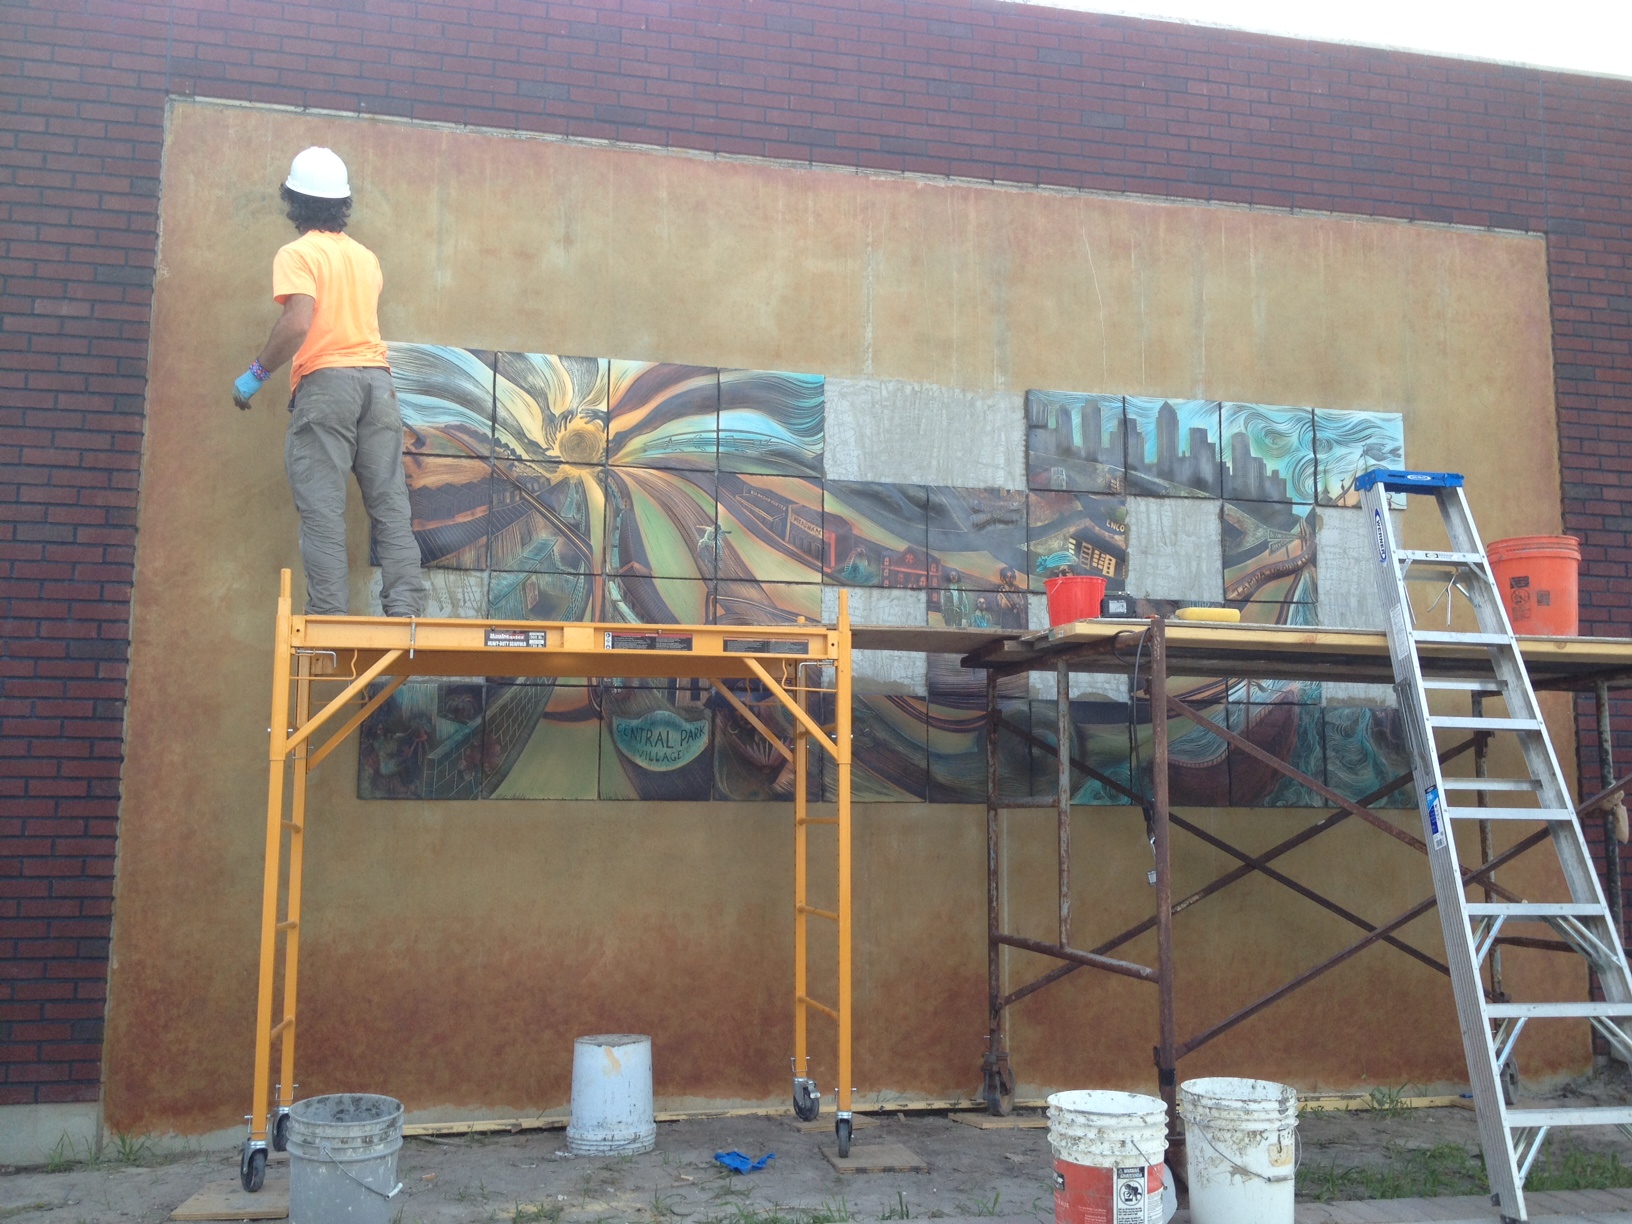
Nick not only installed the tiles, but also created a beautiful "frame" of stained concrete around each mural. First he applied a deep orange acid stain to the entire concrete wall. Then he and Natalie went back and, with small sponges, dabbed on a soy-based stain in blues and purples. This "faux finish" look was then sealed with a soy-based product that created a beautiful sheen. He and Natalie were very happy with the results.

There were other visitors to the work site: Three older Black women who lived in one of the apartment buildings in the complex dropped by one day and told Natalie that they'd grown up in the neighborhood. So Natalie invited them to look at one of the murals. Natalie heard them laughing as they peeked under the protective tarp at the tiles. They were traveling down "Memory Lane" as they saw Natalie's depictions of historical events from their lives. Then one of the women, her hand raised as if in a High Five, exclaimed to Natalie, "Memories!" For Natalie this was the most special moment of the installation. Natalie and Nick also received kudos from representatives of the Bank of America (a major funder) and the Tampa Housing Authority. "It's greater than my expectations," said David from the Tampa Housing Authority. Melissa LeBaron, Tampa's Public Arts Coordinator, also dropped by and was so relieved to see that the last box of tiles had arrived safely from Vermont. (the backstory is that some of the tiles had cracked during the firing process--due to a bad batch of clay--and the studio staff were hard at work remaking those tiles in order to get them to Nick for the installation) Natalie and Nick really enjoyed their time in Tampa. For the most part the weather was beautiful, though quite hot! Because the sun beat full blast on their job site starting at about 1 pm everyday, they began work at 7.

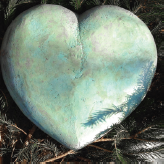
As Natalie says, "We were honored to be part of this amazing project to revitalize this important neighborhood. There's so much history here; the ancestors are watching and waiting to see how it will all turn out. We made our own offering to the ancestors; with the leftover mortar and grout Nick made his "heavy hearts" and we put them in special locations. Now, it is up to the residents to breathe new life into this neighborhood. We trust they will."
Watch this video clip of the unveiling of the murals: 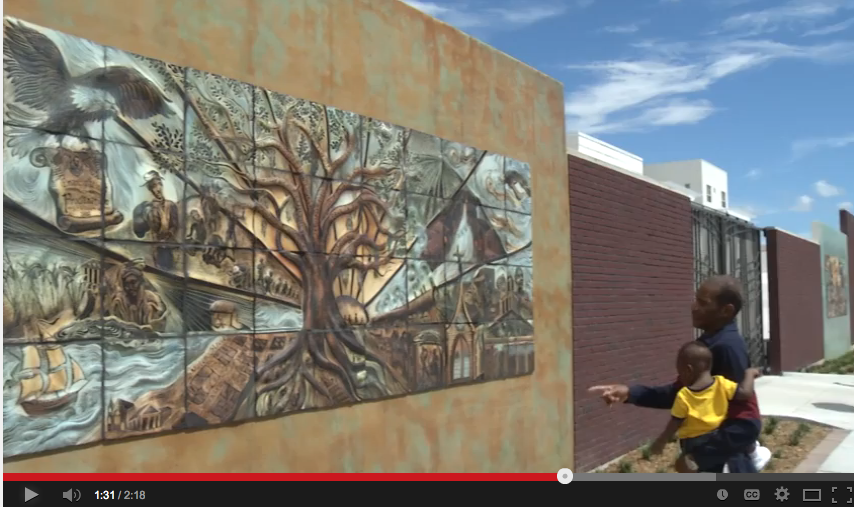 The Gift of Gathered Remembrances, I, II, III
What size should my artwork be?

Unless you work with an interior designer, it may be difficult to know what size wall art will look best in your space. When it comes to finding the right size wall art, there are a few tips to keep in mind so that you don't overwhelm (or underwhelm) your space with your art:
In general you should work around furniture, using the general rule of covering 1/2 to 3/4 of that area with your artwork.
One guideline is that the artwork should take up 4/7 of the selected space. Here's a math trick to help you figure that the size of the art you need:
Measure the width (or height) of your wall space, in inches. Multiply that number by .57
So, for example, if your area is 36 inches wide, you want to look for art that's 20-21 inches wide.
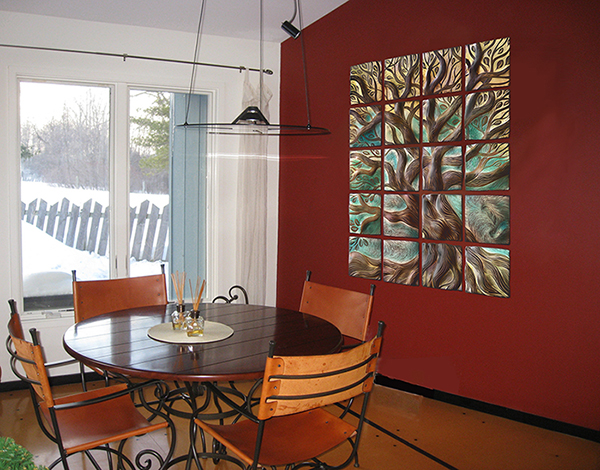
Here's an example of an appropriately-sized mural for this wall. The width of the wall is 96". Using the calculation outlined above, the artwork for this wall should be 54" wide. This ceramic tile mural, Live Oak, is comprised of 12" x 12" tiles, with 1/2" spacing between tiles. So the width of the piece is about 50". You can see that the mural fills the space nicely, with a nice "frame" of wall around the piece so that the room doesn't look cluttered by the artwork.
sculpted, carved ceramic wall art tile by Natalie Blake
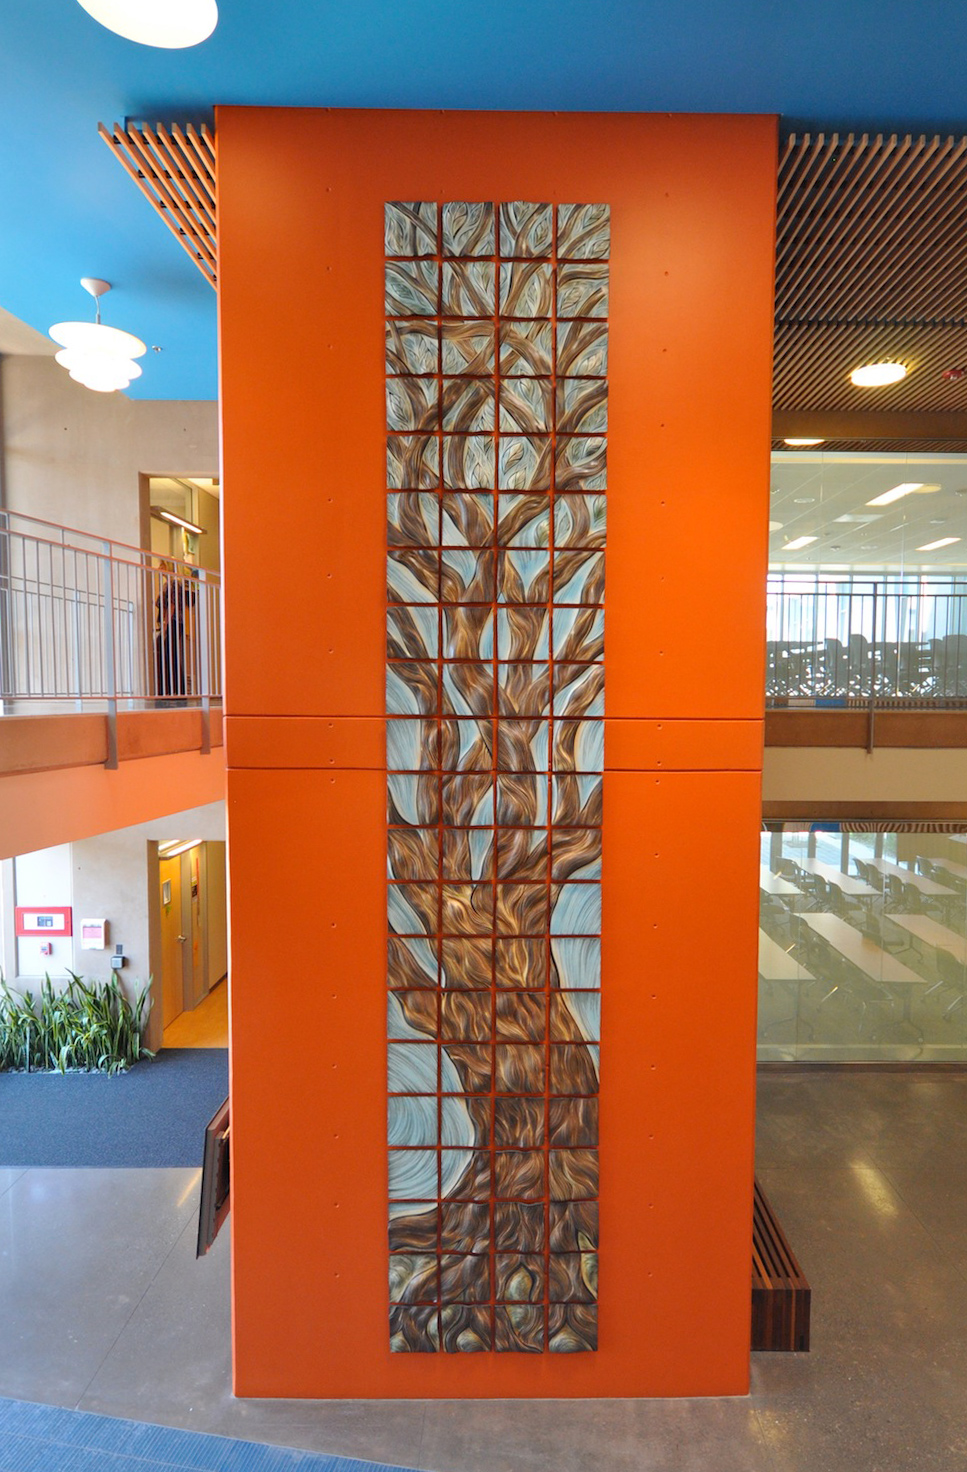
In the example below the width of the wall is 144". Using the calculation, the mural should be about 82". The mural is 75" wide. Even without using the calculation we can see that the piece fits in the space. A large room such as this, with high ceilings, can take a larger piece of artwork. The benefit of a ceramic tile mural like this one is that the work can be appreciated from a distance, or up close to see the carving lines.

sculpted, carved, ceramic tile mural

ceramic wall art tile by Natalie Blake
Feel free to contact the studio if you'd like help determining what size ceramic mural would fit your wall. Our tiles are made in sizes from 12" -20" square. If you send us an image of your wall/space we can Photoshop a mural into the image to give you an idea of what the piece will look like.
Grandmother Tree: From Inspiration to Installation


Custom Designed Tile Mural, Public Art
Our blog has closely followed the creation of several works of ceramic artwork that we installed at Chabot College after receiving their public art grant. Before any designs were drawn or tiles carved, Natalie and Cynthia traveled to the campus to find potential installation sites and gather inspiration from its spaces and its students.
Natalie and Cynthia also got to speak with students, who had influential requests:
“Give us beauty” and “a feeling that we are in nature.”“Remind us that we are HOME.”“Delight us with color to brighten our day.”“Don’t give us anything cliché.”
There were a lot of artistic possibilities at Chabot, but this location jumped out immediately – a towering orange wall in the midst of a wide open space in the newest building on campus, a faculty building. It begged for a custom designed tile mural of massive scale.
Like this perfect spot, it was hard to pass over images of the amazingly stoic and ancient redwood trees characteristic of northern California. A big, grand tree seemed the perfect symbol for this faculty space, representing knowledge and wisdom of generations and the ages in sculptural art.
Cynthia, our project designer, found a fitting design in an interesting way:
"When we were designing our proposal for this public art award we took one of our favorite trees and digitally stretched it onto this column. Shifting scale really changed the feeling of it; we loved the way it transformed the space and the column. The campus voted on their favorite ideas and then the arts committee gave us the go ahead. We were so psyched to take that digital concept and make it into a reality of ceramic artwork.
It was more than three times bigger than the trees we had been making so to accommodate it in our work space we sgraffito carved it in sections starting with the roots. Carving it was like a meditation on each aspect of the trees structure and the vital flow of energy which it embodies." - Cynthia Parker-Houghton
The finished sculptural art mural had 84 tiles, and at a total height of 252 inches, presented a totally new challenge of installation. So, we rented a mechanical lift, and the rest is history – or at least, a timelapse.

Timelapse: Ceramic Artwork Installation
See more images of our Grandmother Tree installation at Chabot College and all of our work on Pinterest.
Custom designed ceramic artwork, Public Art Installation
Tile Wall Art That "Pops" at Fireworks Restaurant
When Fireworks Restaurant in Brattleboro, Vermont, was putting on the finishing touches before opening four years ago, owner Matt Blau invited us to install some of our ceramic tile art in the restaurant. He said, "Do whatever you want. You tell me what you think would look good."
After those magic words, we brought some
that we had in stock to the Brattleboro restaurant and began looking at color and design. Our rich glazes worked really well against the wall colors and our designs seemed to fit naturally with the other design elements in the space. Almost on their own, these two ceramic tile murals found their home on the painted walls. The persimmon-colored abstracted tree, hung on the diagonal, added the perfect "fiery" entrance greeting to make the customer feel at home in the warm, vibrant surroundings and ready for good food. The mural is set for the perfect feng shui to provide a sense of invitation and arrival.
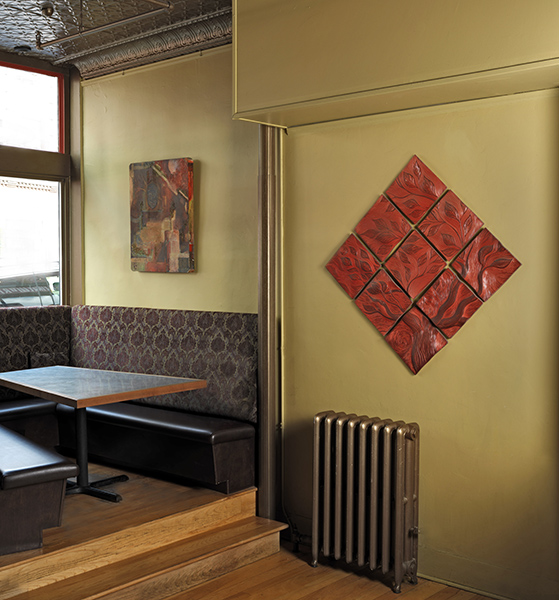
Wall Art in Fireworks Restaurant
The turquoise and burnt oak glazes on the long two-tier "window" of tiles absolutely popped over the rich dark purple black hues of Benjamin Moore's paint color "
". We decided on a simple and straightforward presentation of the tiles that sit over the side bar. They present almost like a transom window at slightly higher than eye level to add sophistication and elegance.

Vermont Tile Wall Art by Natalie Blake Studios

Vermont Tile Wall Art in Restaurant
On a recent visit to the restaurant Natalie received the following list of patron's quotes about the art tiles from the manager:
"Love the texture and color!"
"They are decorative, yet finely crafted."
"Love the botanical elements."
"Understated elegance."
"Love that the artist is local."
We love working with local businesses, and our wall art tiles are also installed in the second Fireworks Restaurant in Keene, NH. Not only are the businesses, and their owners, our friends, but we have the pleasure of seeing the art transform a space whenever we explore Brattleboro.
Placing our art in restaurants and doing an installation like this is so much fun for us. It's always a pleasure to find a blank slate, so to speak, to get creative, to work with the client, and to complement existing design elements from the space. It really gets our creative juices flowing!
Using Handmade Ceramic Tile with Field Tile
We see a "canvas" for Natalie Blake Studios tiles wherever a tiled surface, as in a kitchen, a bathroom, or a pool area, needs a pop of color or a handmade touch. Adding a mosaic tile mural to a tiled backsplash or wall is an artful way to get both the eye-catching appeal of handmade ceramic tile art and the functionality of traditional tile. When using handmade ceramic tile with field tile, choose tiles and colors that complement each other yet are different enough to make a statement. Glossy, solid- colored field tiles spotlight the richly detailed and colorful forms of Natalie Blake Studios' mosaic tiles, which in turn become an elegant centerpiece of the room.

Nautilus Shower Mural
Mosaic Tile as Shower Art Our handmade ceramic bath tiles are versatile and can be used in wet and outdoor environments, like showers and saunas, and are actually well suited for it (they’re ceramic tile, after all). This piece, Nautilus, is installed in a townhouse apartment bathroom in Washington, DC, where it adds depth and color to the clean, modern design of the bathroom.
For showers, kitchens, and anywhere that splashes are likely, it is essential to properly seal and install the tiles to protect them from dirt and damage.
Handmade Ceramic Tile in Kitchen Backsplashes Using our art tile as the highlight in a kitchen backsplash is one of our favorite ways to see our tiles installed. In the installation below, the playful shapes and colors of the Flowerscape, set off by the surrounding smooth field tile, break up the white of the kitchen.

Flowerscape, Handmade Ceramic Tile Backsplash
Our square tiles can also be incorporated into a tiled kitchen backsplash. Large murals or shorter horizontal groups add a vibrant splash of color to fit almost any size wall space (and many are in stock and ready to buy).

Adavasi Backsplash

Tree Branch, Backsplash, Handmade Ceramic Tiles
Handmade Tile in an Outdoor Landscape
Here's an example of handmade ceramic tile as decorative accents in a poolside, stone wall. The colorful tiles break up the monotone color of the stone wall and play off the beautiful, blue pool.

Handmade Tiles, Outdoor Pool Tiles
The possibilities are limitless. For more ideas on using handmade ceramic tiles in the kitchen, bathroom and even outdoors, get inspired by Natalie Blake Studios on Pinterest and Houzz. Keep an eye out forour new line of backsplash tiles, designed to fit as a mosaic or accent piece within a field tile backsplash (coming in the fall). Here's a sneak peek of our backsplash design tests:

Natalie Blake Studios Backsplash Tiles, coming soon

Mural hangs in Hawaii

This piece, called Mauna Kea, is installed on a stone wall in a garden at a Hawaiian residence. Natalie met the clients at the Philadelphia Museum Show. They saw her work and commissioned a mural to decorate this wall, which blocked their view of the volcano, Mauna Kea (side note: it's the highest point on the island of Hawaii). They wanted a piece that would "show" them the volcano. Natalie embellished the design with flora from the island, including the wild ginger plant. Natalie's fiance, Nick, installed the piece. His meticulousness ensured that the tiles are straight and inline with each other--not an easy task on an irregularly-shaped, stone wall. Here's what the client says about the piece: "Your work just keeps on amazing us. We love our volcano, especially during the evening when the setting sun lights it. I also love the face that inadvertently showed up in the clouds to blow the wind. Absolutely genius."


Outdoor installations of ceramic tile murals

Natalie Blake Studios tiles can be installed indoors or outdoors. The high-fired, durable, sun and weather resistant tile can be grouted into a permanent installation or hung as a tile mural. The modular format of the tiles can be adapted to suit architectural niches, angles, large or small spaces, curved walls, and indoor or outdoor applications. Check out these outdoor installations: Click on the images to enlarge them.

